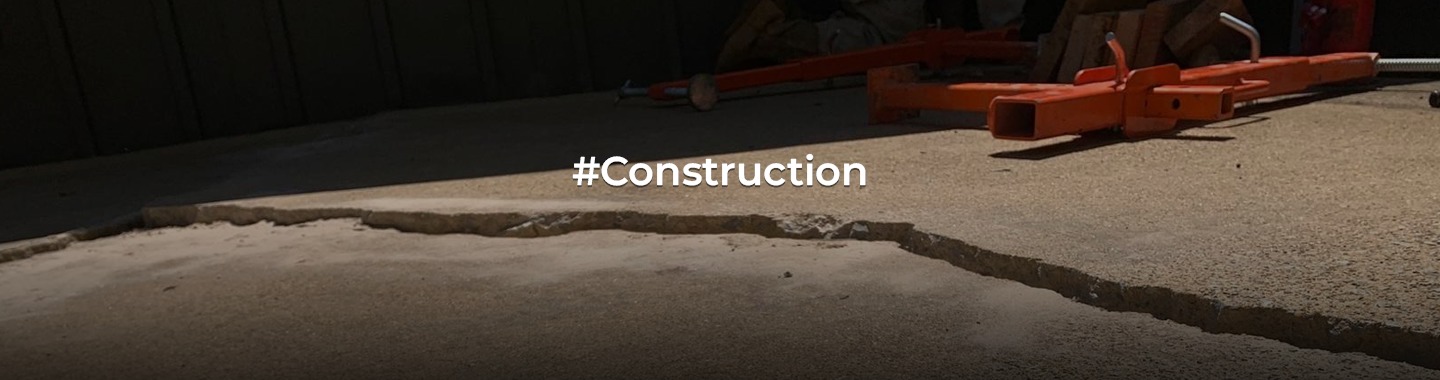
Concrete Repair 101: A DIYer’s Guide to Tackling Cracks!
Concrete is a durable and commonly used building material, but over time, it can develop cracks. These cracks not only affect the aesthetics of your property but can also lead to structural issues if left unaddressed. The good news is that repairing cracks in concrete is a DIY-friendly project that doesn’t require advanced construction skills. In this guide, we will walk you through the steps to effectively fix cracks in concrete and restore the integrity of your surfaces.
Materials You’ll Need
Before you get started, gather the necessary materials and tools:
- Safety Gear: Safety goggles, gloves, and a dust mask to protect yourself from dust and debris.
- Concrete Repair Caulk: Choose a high-quality concrete repair caulk that’s designed for your specific project.
- Chisel and Hammer: For widening cracks and creating a proper surface for the caulk to adhere to.
- Wire Brush: To clean out debris and loose material from the crack.
- Vacuum Cleaner: To remove dust and dirt from the crack.
- Concrete Patching Compound: Used for larger cracks or deeper holes.
- Trowel: For smoothing and leveling the patching compound.
- Putty Knife: For applying caulk and patching compound.
- Paint or Sealer (optional): To match the repaired area with the rest of the concrete surface.
Step 1: Safety First
Always put safety first. Wear your safety gear and ensure you’re working in a well-ventilated area.
Step 2: Assess the Crack
Examine the crack to determine its width and depth. If it’s wider than 1/4 inch, consider using a patching compound instead of caulk. Deeper cracks may require additional steps.
Step 3: Prepare the Crack
a. Use a wire brush to clean the crack thoroughly, removing any loose material. b. For wider cracks, use a chisel and hammer to create clean, even edges. This helps the patching material adhere better.
Step 4: Vacuum the Crack
Use a vacuum cleaner to remove all dust and debris from the crack. This ensures a clean surface for the caulk or patching compound to bond to.
Step 5: Apply Caulk or Patching Compound
a. If you’re using caulk, cut the tip of the caulk tube at a 45-degree angle and apply it into the crack, making sure it’s slightly overfilled. b. If you’re using patching compound, mix it according to the manufacturer’s instructions and trowel it into the crack, leveling it with the surrounding surface.
Step 6: Smooth and Finish
Use a putty knife or trowel to smooth the caulk or patching compound, ensuring it’s level with the surrounding concrete. If needed, apply more material to achieve a smooth finish.
Step 7: Let It Cure
Follow the manufacturer’s instructions regarding curing time for the caulk or patching compound. This usually takes 24 hours or more.
Step 8: Optional Finishing Touches
If you want the repaired area to match the rest of the concrete surface, you can paint or seal it once the repair is fully cured.
Repairing cracks in concrete is a manageable DIY project that can save you money and maintain the integrity of your property. With the right materials and a bit of patience, you can restore the appearance and structural soundness of your concrete surfaces. Remember to always prioritize safety and follow the manufacturer’s instructions for the materials you use. Now, armed with this guide, you can confidently tackle those cracks in your concrete surfaces and enjoy a smoother, more appealing result.
Disclaimer: The views expressed above are for informational purposes only based on industry reports and related news stories. PropertyPistol does not guarantee the accuracy, completeness, or reliability of the information and shall not be held responsible for any action taken based on the published information.