DIY Tile Project: Laying Tiles Like a Pro!
Tiling is a versatile and stylish way to enhance the aesthetics of your home. Whether you’re looking to upgrade your kitchen backsplash, renovate your bathroom, or add a beautiful floor finish, knowing how to lay tiles is a valuable skill for any DIY enthusiast. In this comprehensive guide, we’ll take you through the step-by-step process of laying tiles, from preparation to grouting, helping you achieve professional-looking results in your home improvement project.
Tools and Materials You’ll Need
Before we dive into the tiling process, gather the necessary tools and materials:
- Tiles
- Tile adhesive
- Notched trowel
- Tile spacers
- Tile cutter or wet saw
- Level
- Measuring tape
- Pencil
- Grout
- Grout float
- Sponge
- Buckets
- Safety goggles and gloves
- Knee pads (optional)
Step 1: Prepare the Surface
- Ensure the surface you plan to tile is clean, dry, and smooth. Remove any existing flooring or wall coverings.
- Use a level to check for uneven areas. If you find any, patch them with a suitable filler and sand the surface smooth.
Step 2: Plan Your Layout
- Begin by deciding where you want to start laying the tiles. Typically, it’s best to start from the center and work your way outward, especially for floors.
- Use a measuring tape and pencil to mark the center point and create guidelines for your tile layout. Dry-fit some tiles to visualize the pattern and make any necessary adjustments.
Step 3: Apply Tile Adhesive
- Mix the tile adhesive according to the manufacturer’s instructions. It should have a consistency similar to peanut butter.
- Starting from the center point, use a notched trowel to spread a thin, even layer of adhesive onto the surface. The notches on the trowel create grooves that help the tiles adhere properly.
- Work in small sections, as the adhesive can dry quickly.
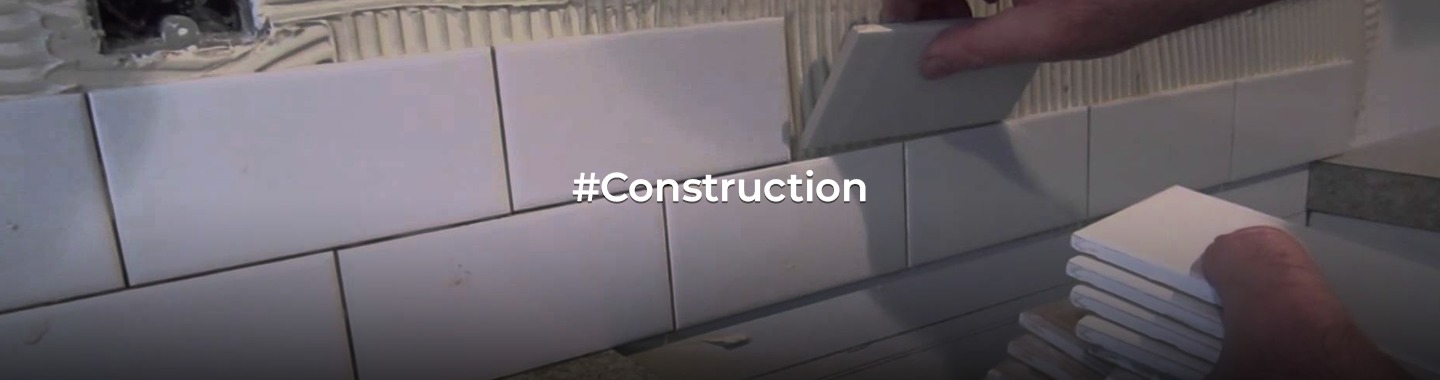
Step 4: Lay the Tiles
- Carefully place the first tile onto the adhesive, aligning it with your layout guidelines. Press it down firmly, ensuring it’s level and flush with the adjacent tiles.
- Insert tile spacers between the tiles to maintain consistent gaps for grouting.
- Continue placing tiles, working your way outward and following your layout plan. Be mindful of the pattern and keep the tile spacers in place.
Step 5: Cut Tiles as Needed
- Measure and mark any tiles that need to be cut to fit the edges or corners of the area. Use a tile cutter or wet saw to make precise cuts.
- Always wear safety goggles and gloves when cutting tiles.
Step 6: Allow Tiles to Set
- Allow the adhesive to cure for the recommended time specified by the manufacturer. This typically ranges from 24 to 48 hours.
- Avoid walking on the newly laid tiles during this time.
Step 7: Grout the Tiles
- Once the adhesive is fully set, mix the grout according to the manufacturer’s instructions.
- Using a grout float, apply the grout diagonally across the tile joints, ensuring all gaps are completely filled.
- After a short drying time (usually around 15 minutes), use a damp sponge to wipe away excess grout from the tile surfaces.
- Rinse the sponge frequently to keep it clean.
Step 8: Final Cleaning and Sealing
- After the grout has dried for a day or two, buff the tiles with a clean, dry cloth to remove any remaining grout haze.
- If you’re tiling a wet area like a bathroom or kitchen backsplash, consider applying a tile sealer to protect the grout from moisture and staining.
Conclusion
Learning how to lay tiles is a rewarding DIY project that can enhance the beauty and functionality of your home. With careful planning and attention to detail, you can achieve a professional finish that adds value to your space. Whether you’re tiling floors, walls, or backsplashes, following these steps will help you create a stunning and lasting tile installation.
Disclaimer: The views expressed above are for informational purposes only based on industry reports and related news stories. PropertyPistol does not guarantee the accuracy, completeness, or reliability of the information and shall not be held responsible for any action taken based on the published information.


Thanks for all your efforts and info. We’re just some humble Tile Pro Depot LLC
“